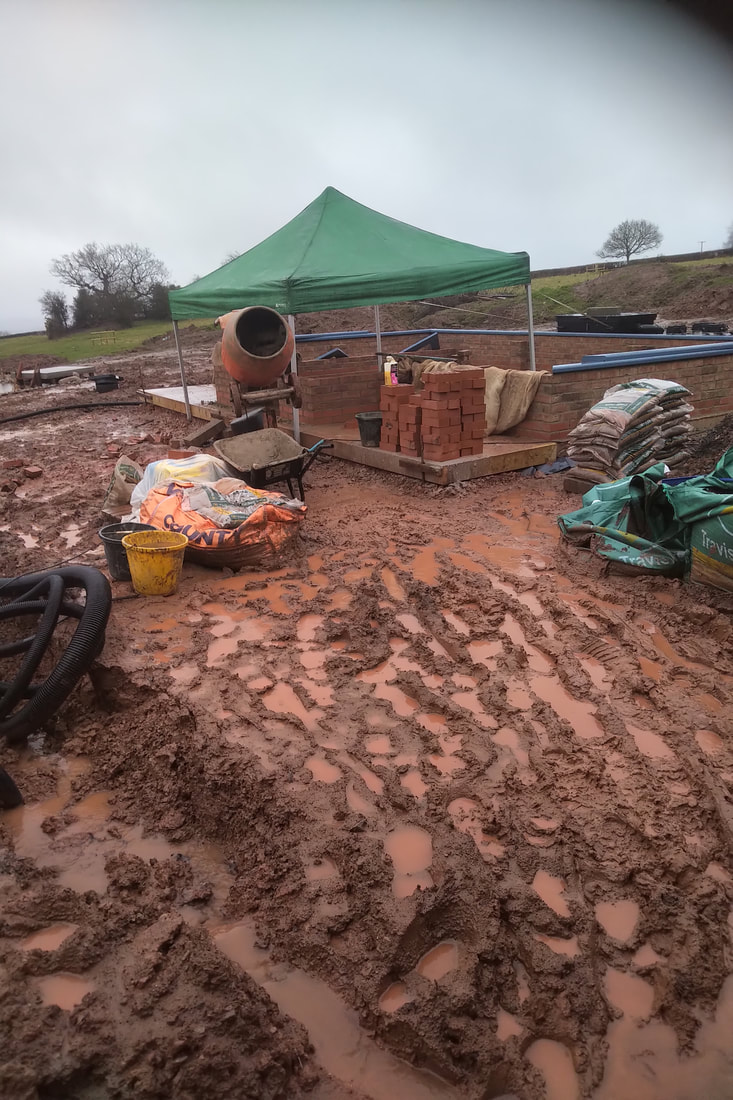
 This week was a struggle! The rain didn't stop beating down for a solid 13hours. However, I carried on as there was so much soil and turf to remove and take to another part of the garden. Thankfully we had a short break in the weather on Friday morning and I managed to complete everything, It looks such a state now it's hard to imagine it looking complete and tidy - but you'll have to as it was pelting it down once I finished and couldn't get another photo! I'll be back here soon though. 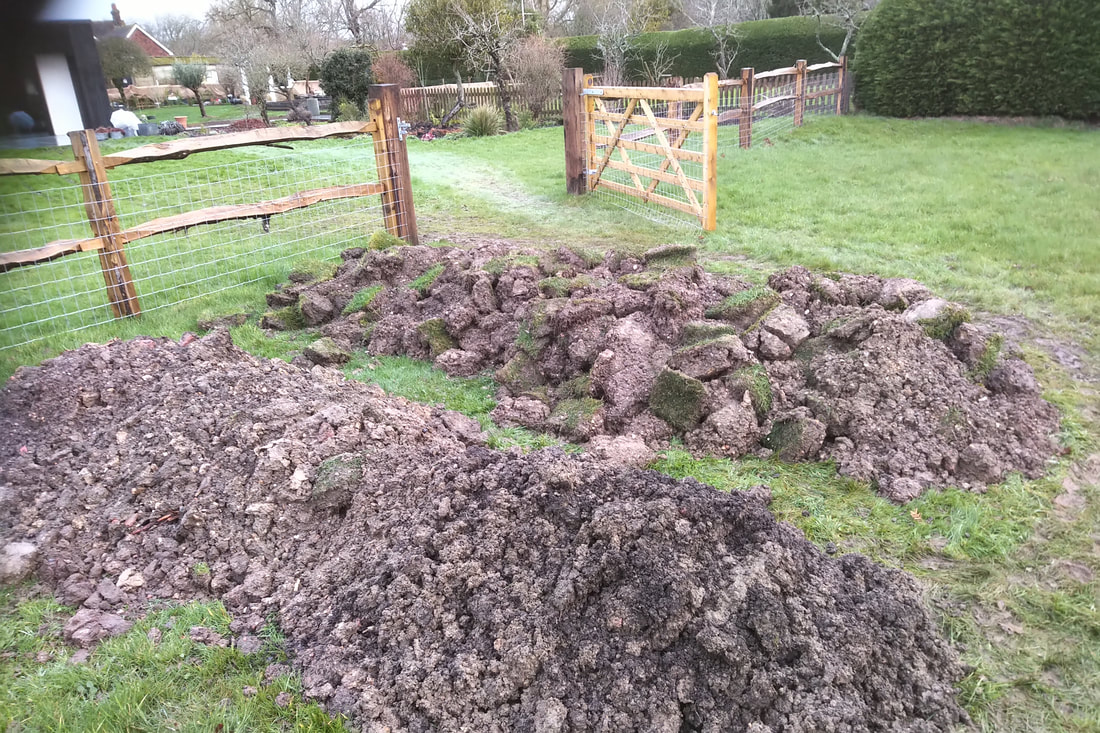
0 Comments
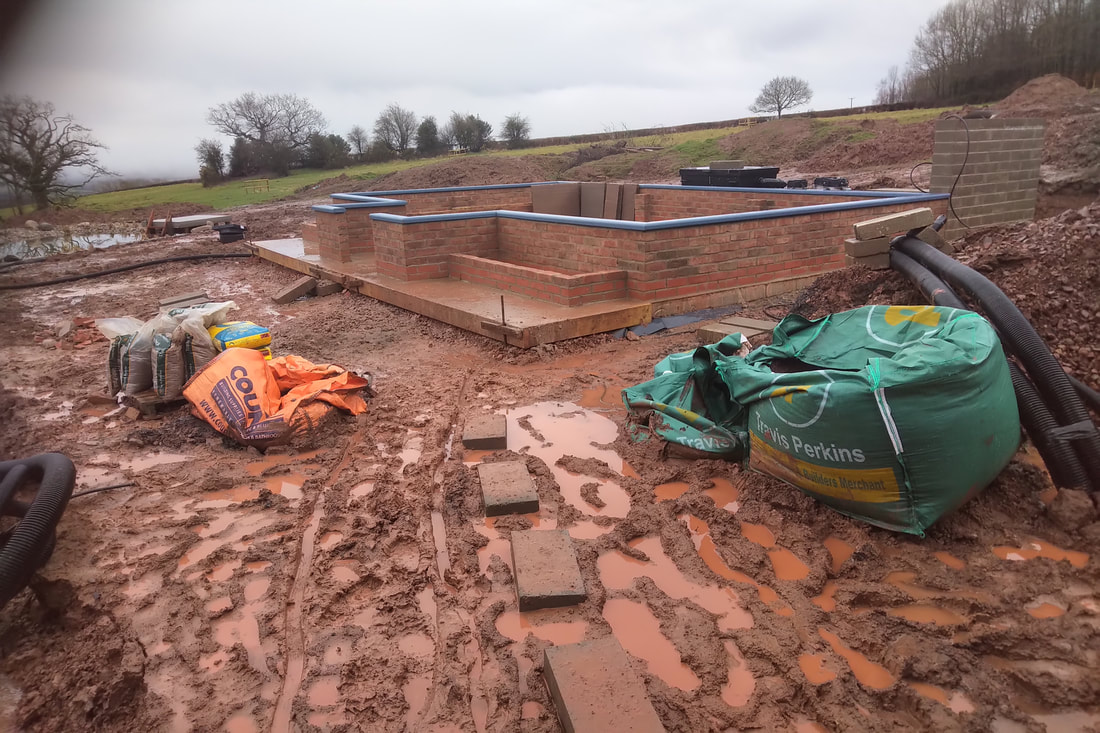
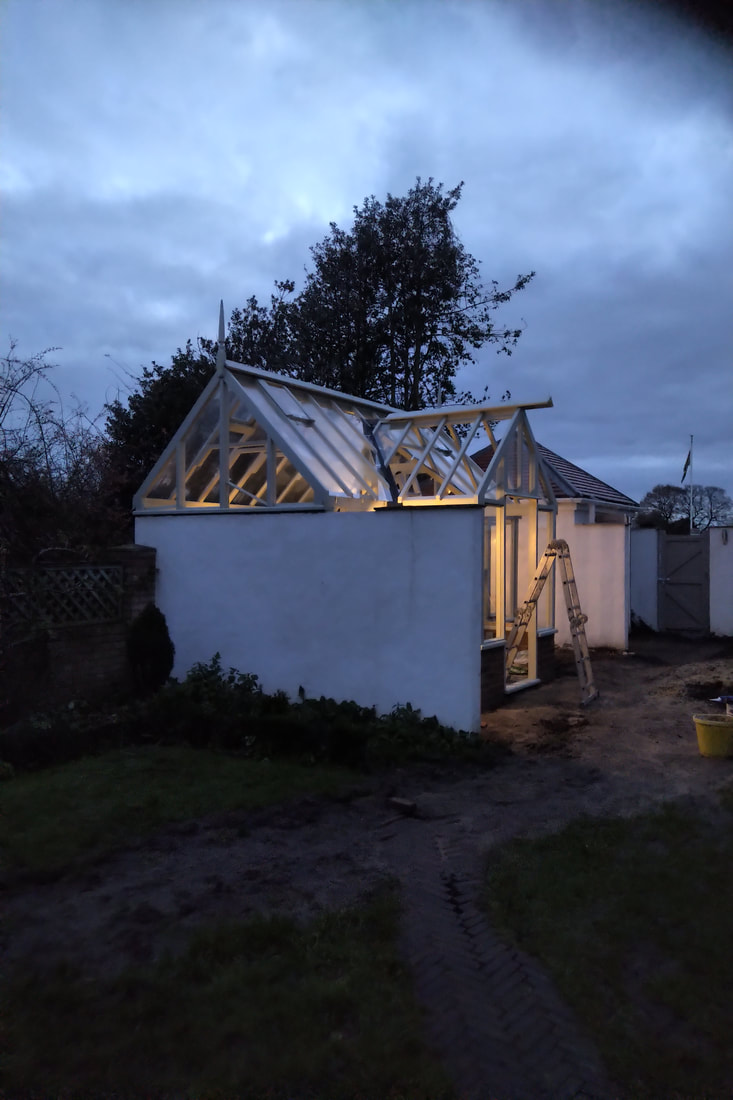
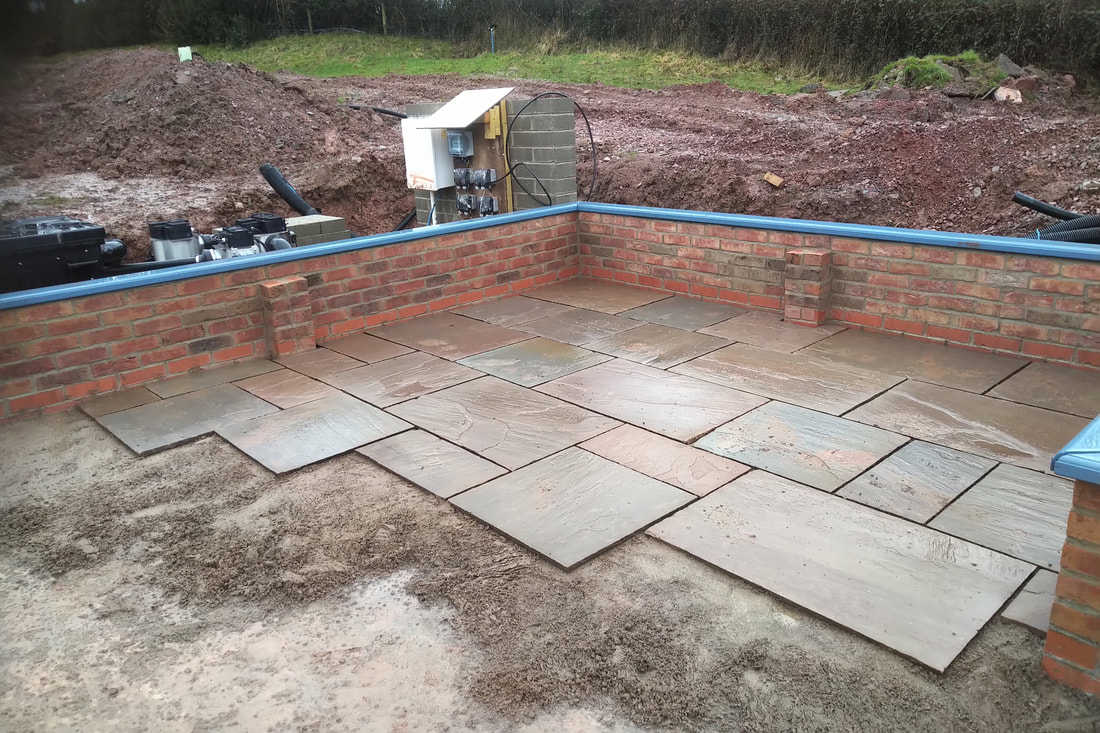 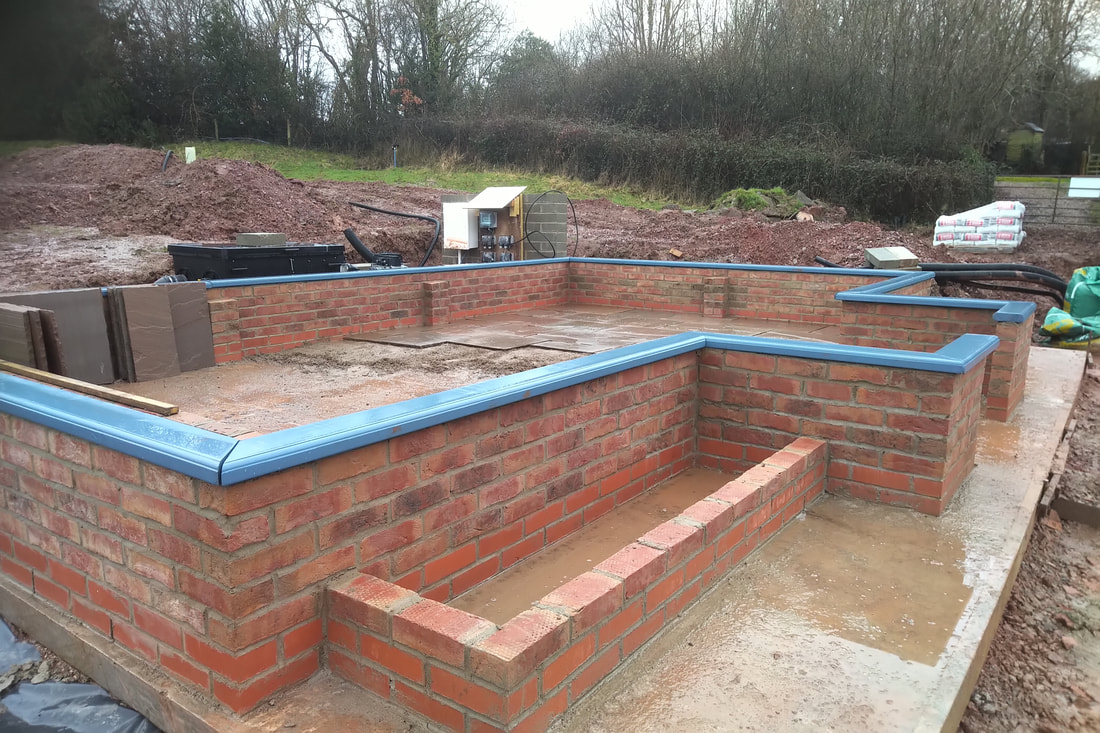 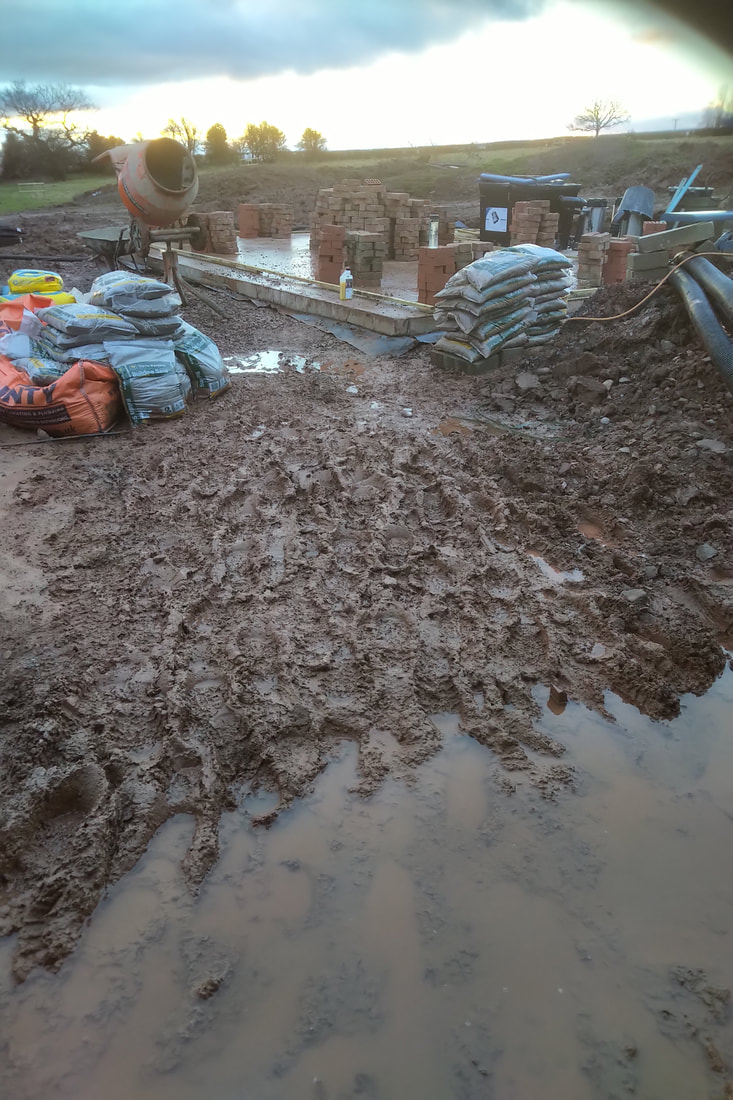 This is a proper building site at the moment - JCB's digging trenches, a barn being erected, the swimming pool just finished. Thankfully, given all the mud, I am building directly on to a concrete plinth for the base of this greenhouse. Unfortunately it was a little smaller than planned so I'll have to return to complete the walls once the builders have extended the plinth by another 1 metre. 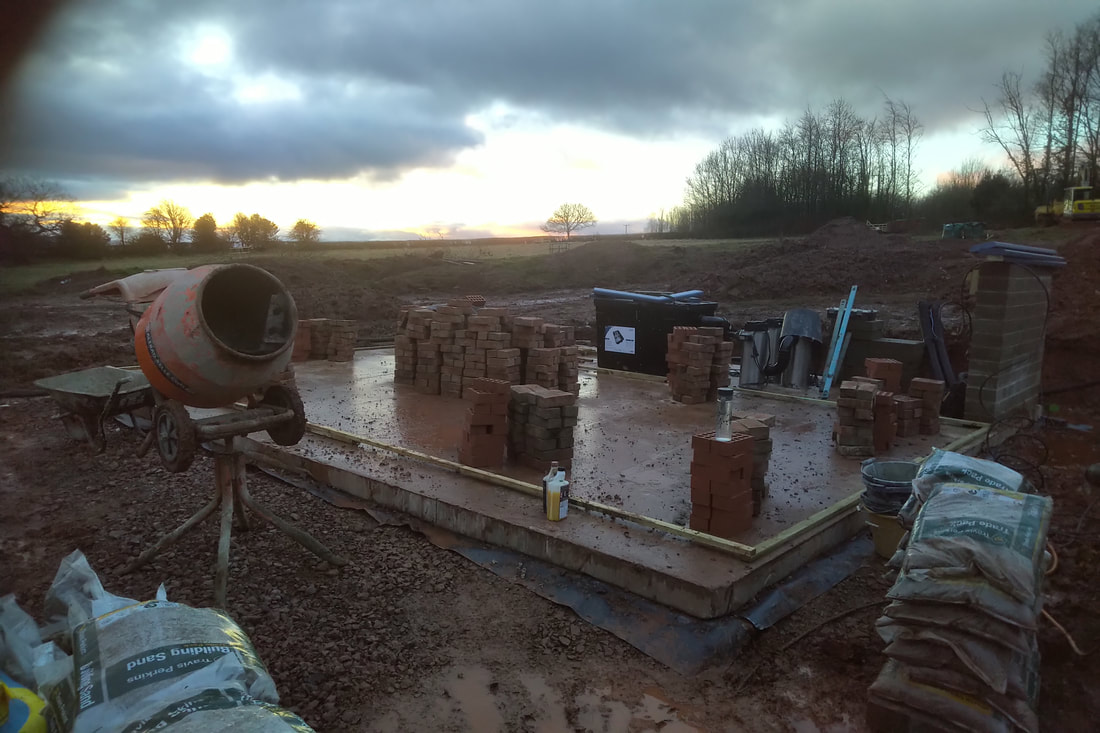 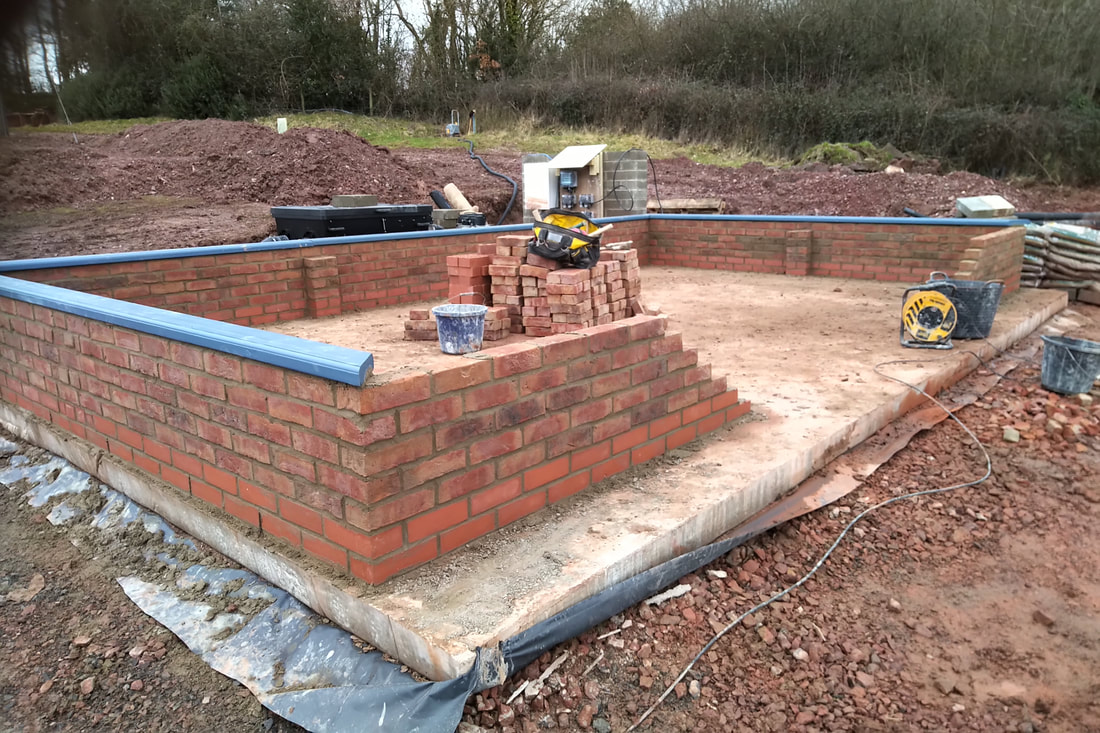   It was great to get back here to install this greenhouse and I only just made it as the van was playing up for the whole journey. As it turned out I broke down on the return journey - at 7pm Friday night on the M6 in Brum! Not fun - but it wasn't raining and the AA got me home by around 2am.  I got this wonderful photo and a card from my customers.... 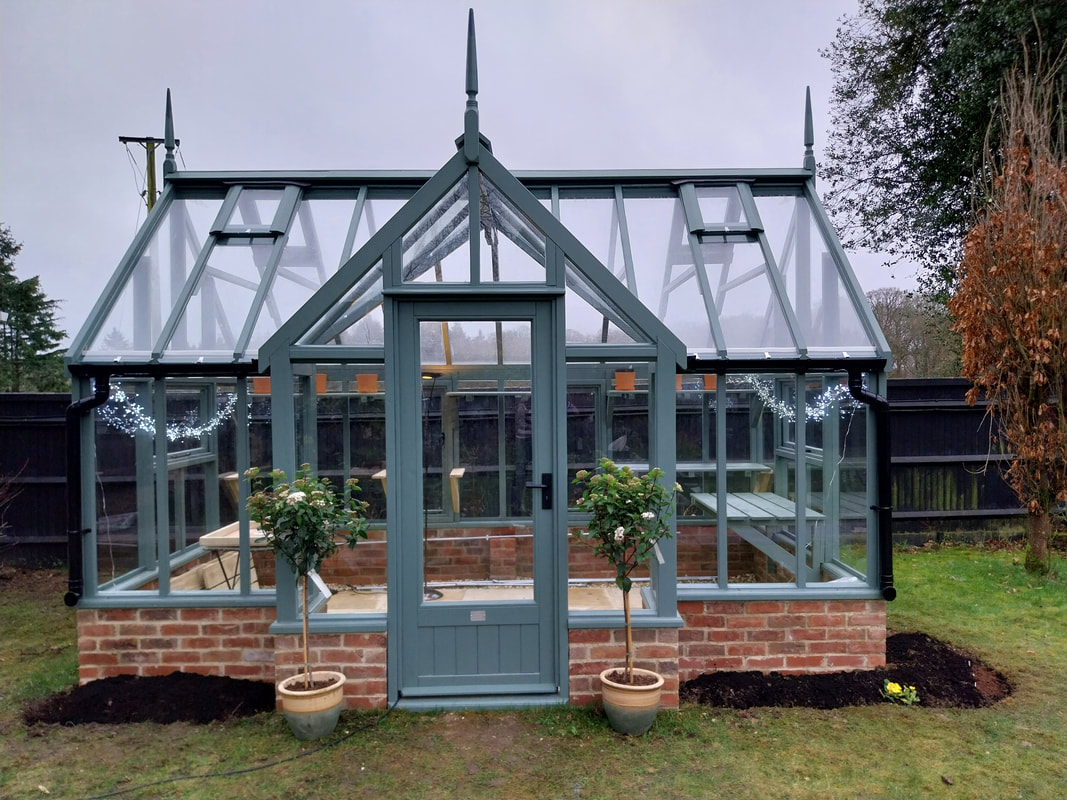 Robin, I just want to thank you so much for the absolutely superb glass-house you have built me! Your level of professionalism and incredibly high standards are obvious to see! We are so thrilled with it - I'm in there every day, even though the weather has not been kind enough for me to dig out a bed around it! Or for Cliff to do the path! Thank you so much! Ali and Cliff x 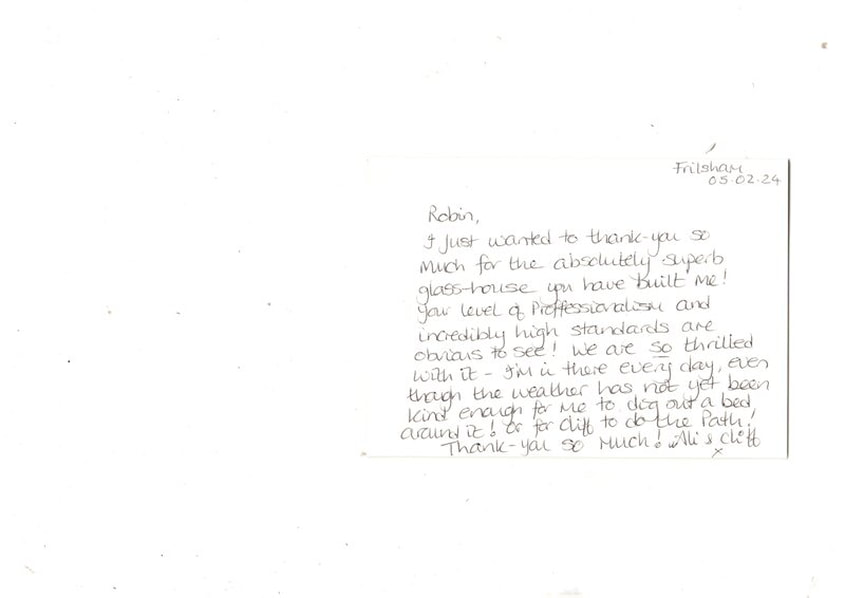 Building a plinth at home as a base for our "Tim" greenhouse - and to overcome the sloping site.    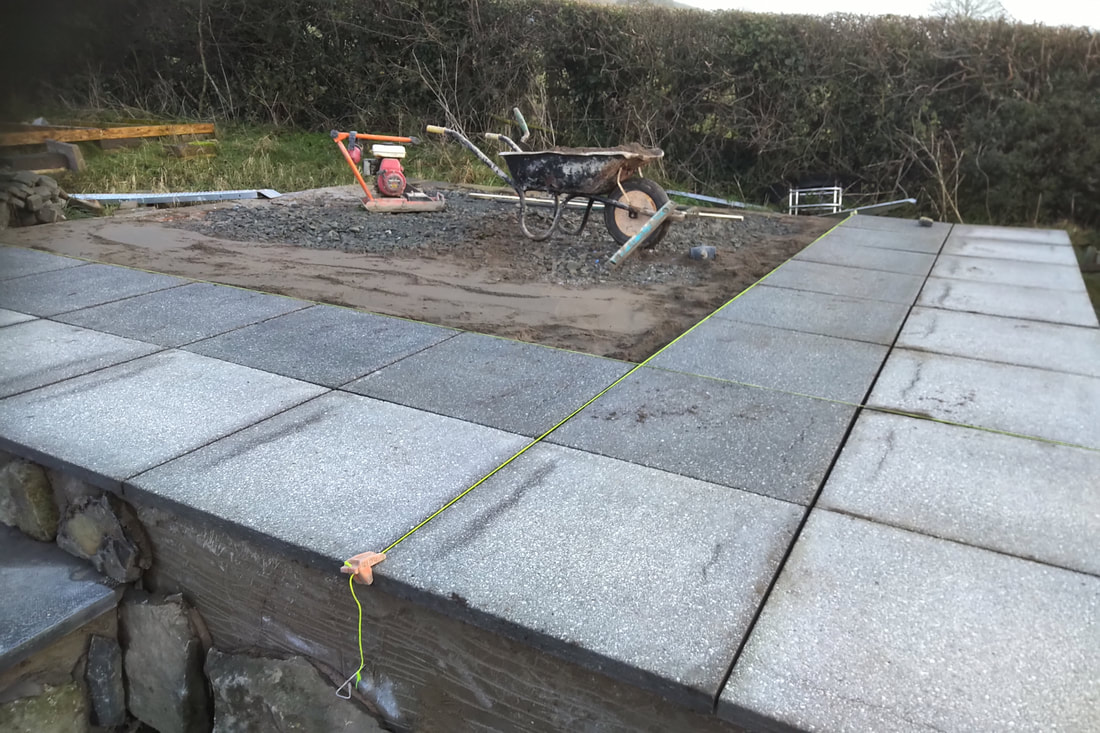 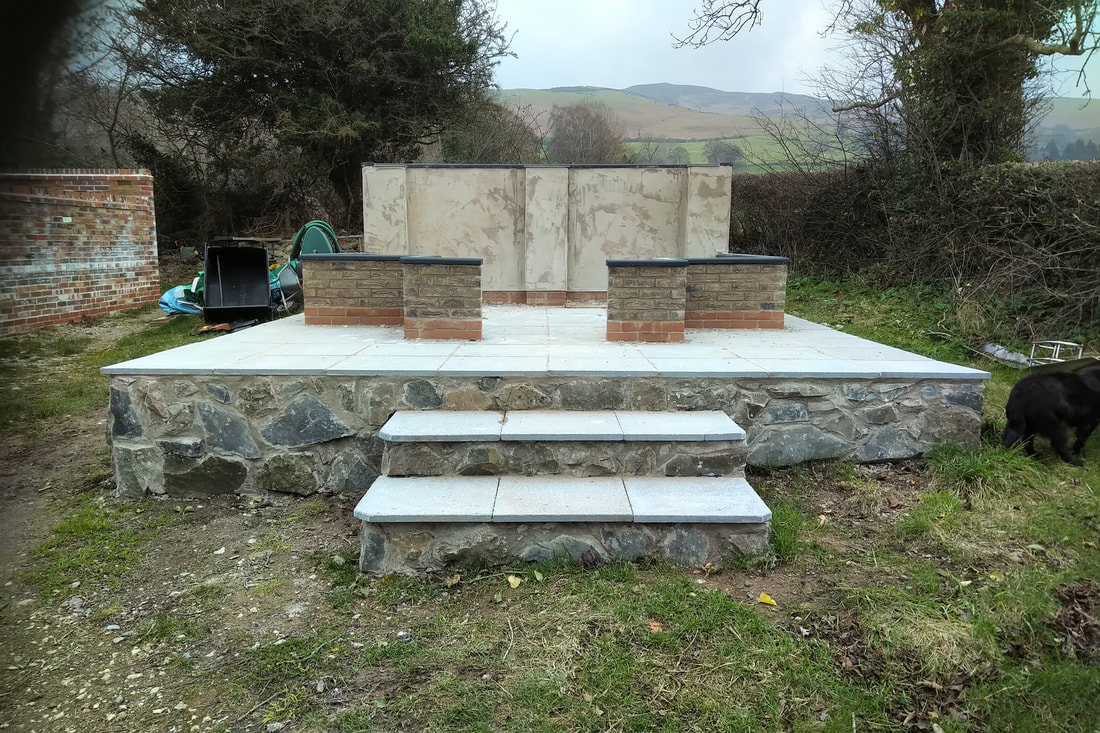 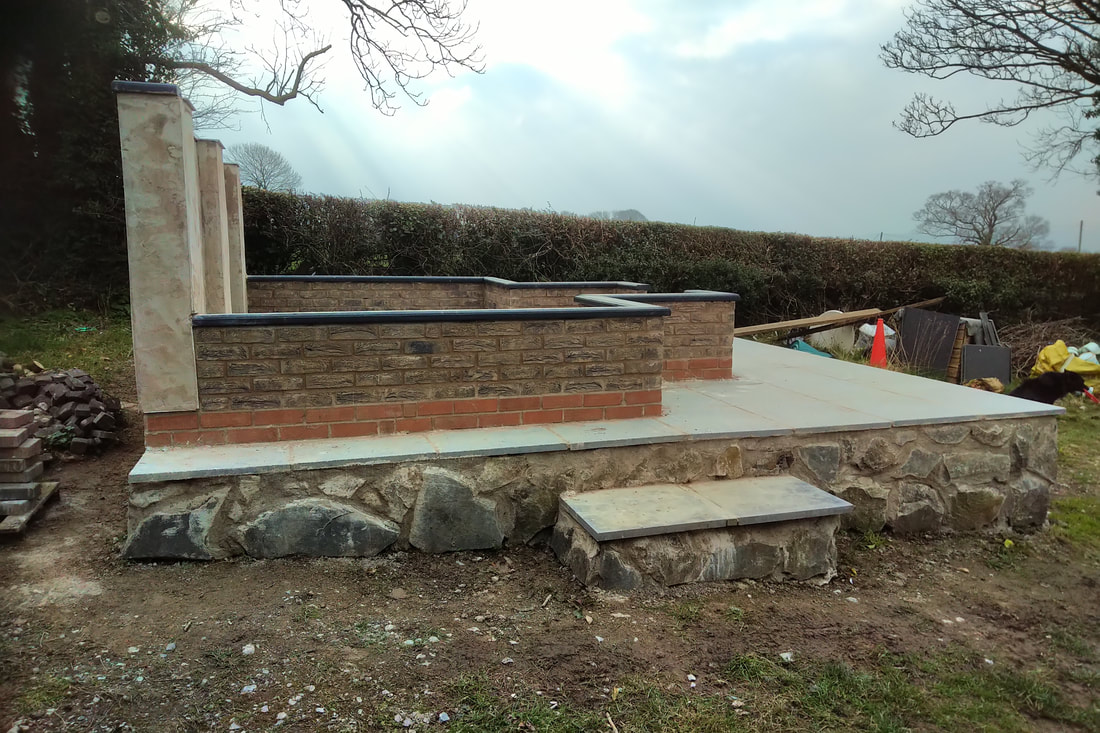 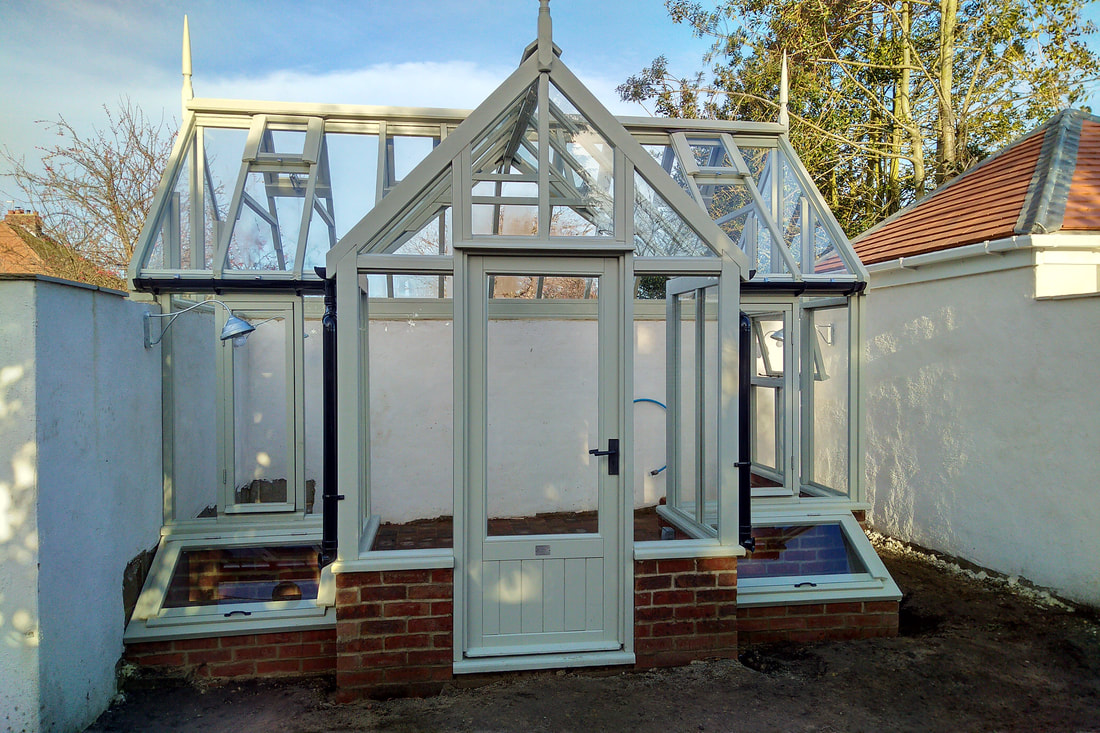 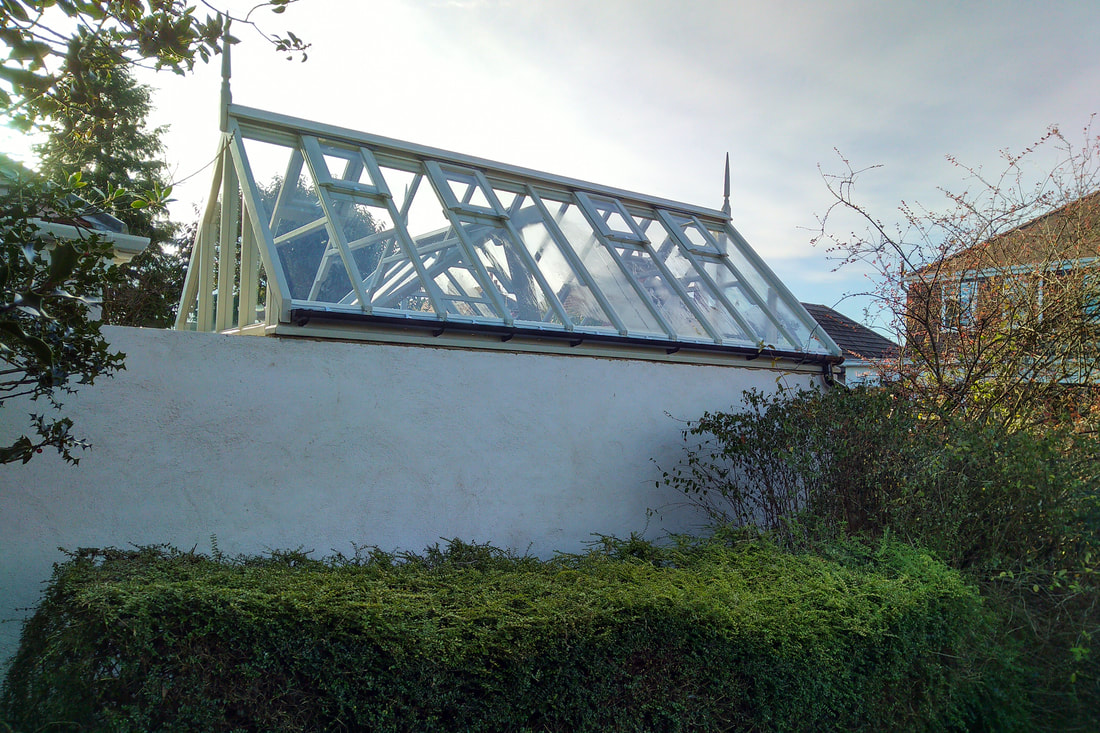  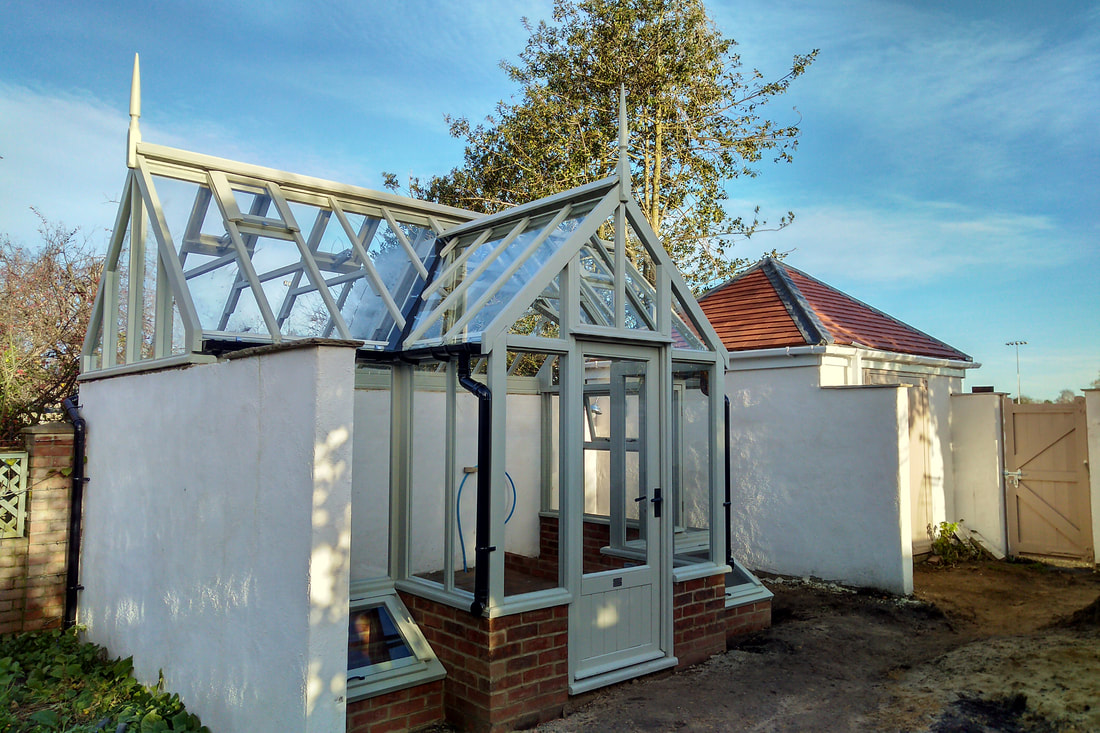
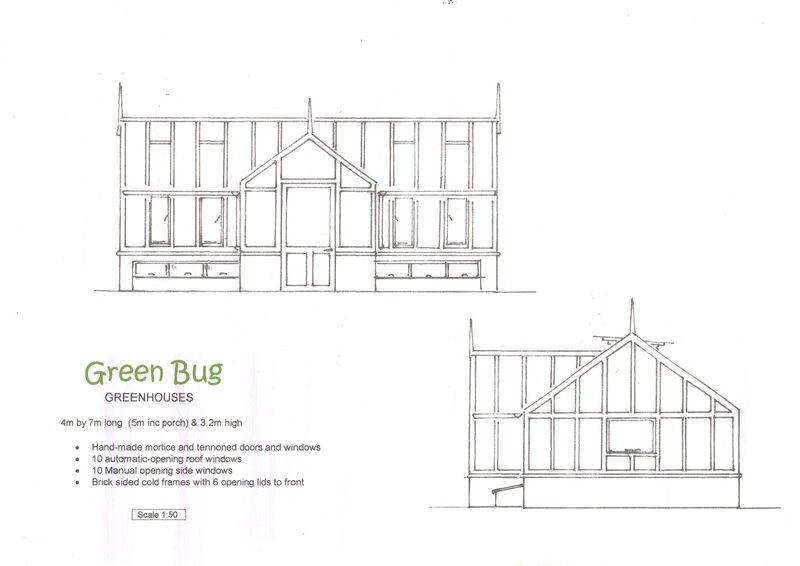 I'm currently getting ready for a huge greenhouse which comes ready in Jan. It's 7m long by 4m wide with a 2.5m wide porch, has 10 auto-opening roof windows, 10 more opening windows around the sides, over 100 panes of glass some of which are 2.5m long. For the base I'll also be laying a sandstone floor. I'm machining up and painting tonnes of wood in preparation.
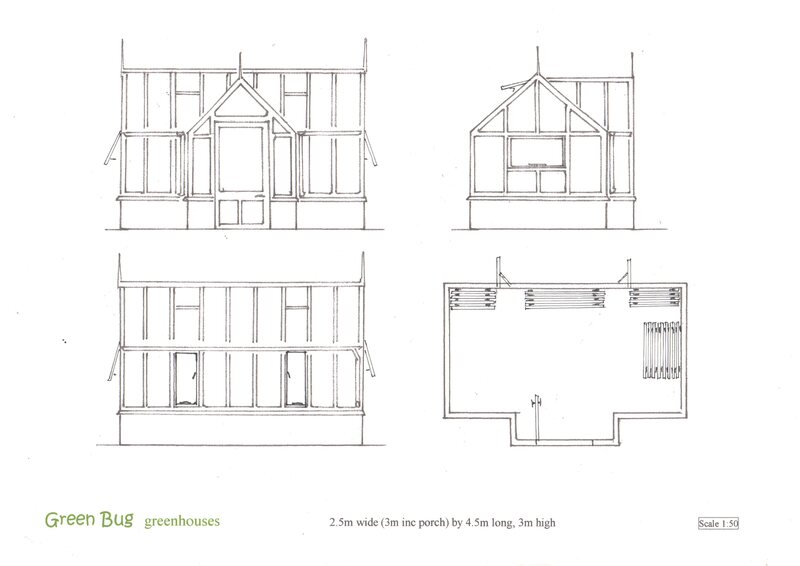 This week I'm in Reading building the base for a 4.5m long greenhouse which is 2.5m wide with a 2m wide porch extending out by 1m. There are lots of side opening windows and 4 auto openers in the roof too giving lots of ventilation choice. 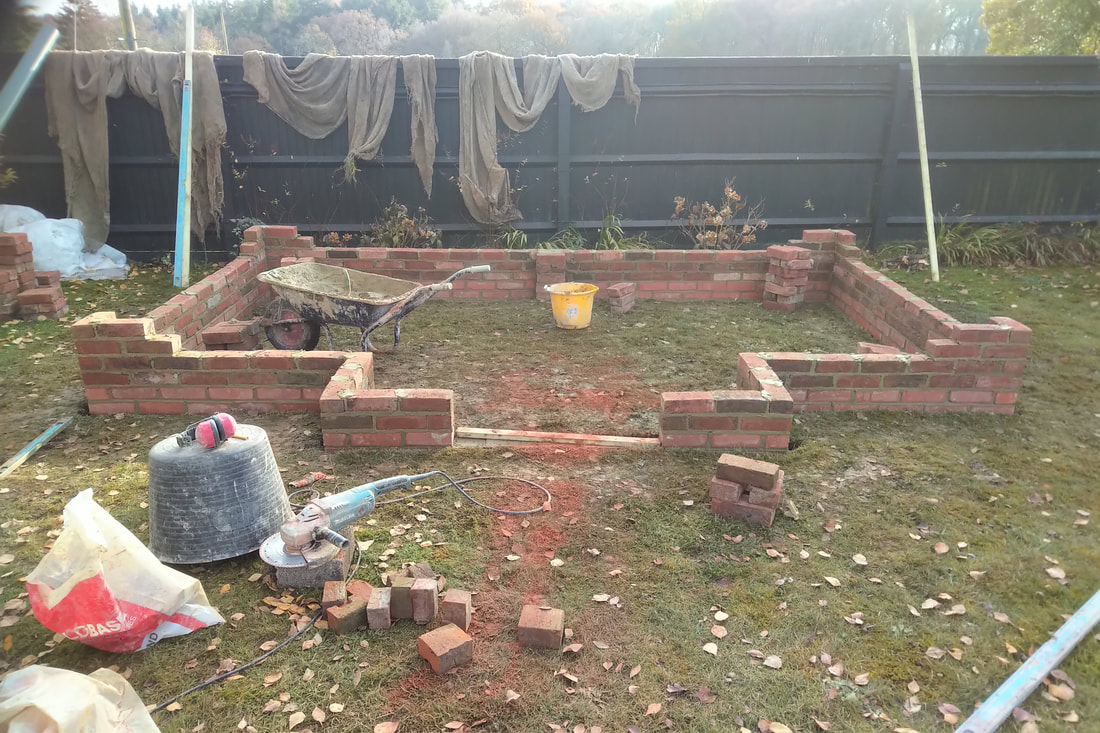 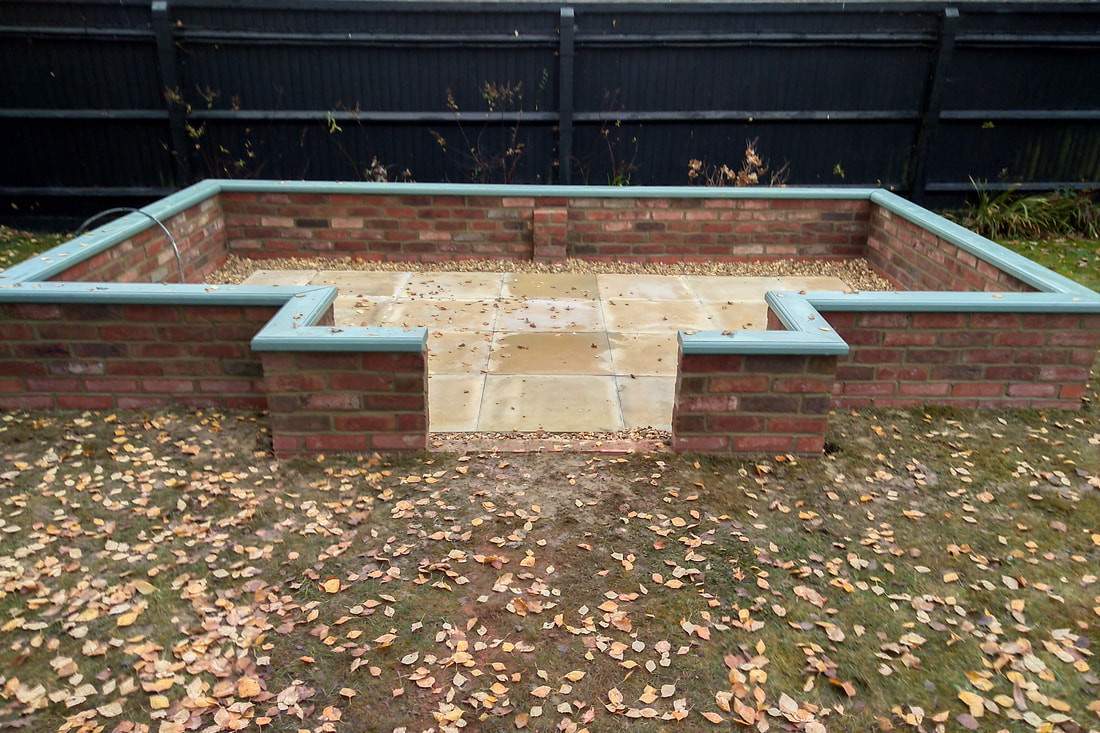 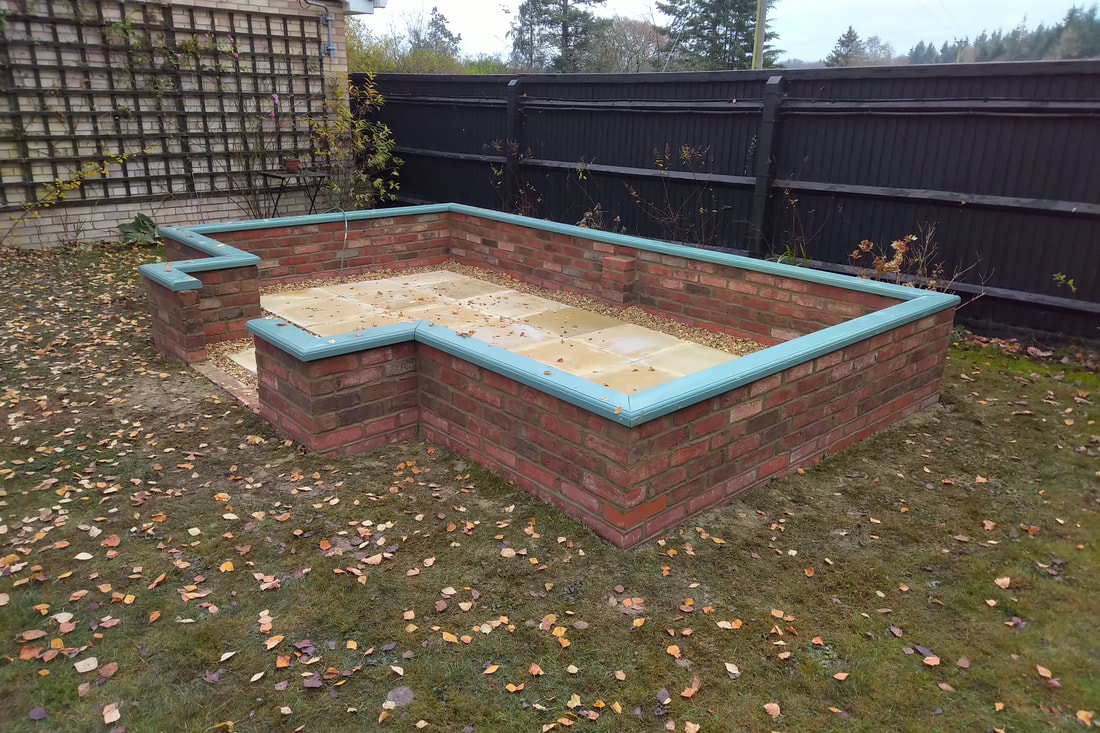 I'll be back just after Christmas to install the greenhouse structure over this base.
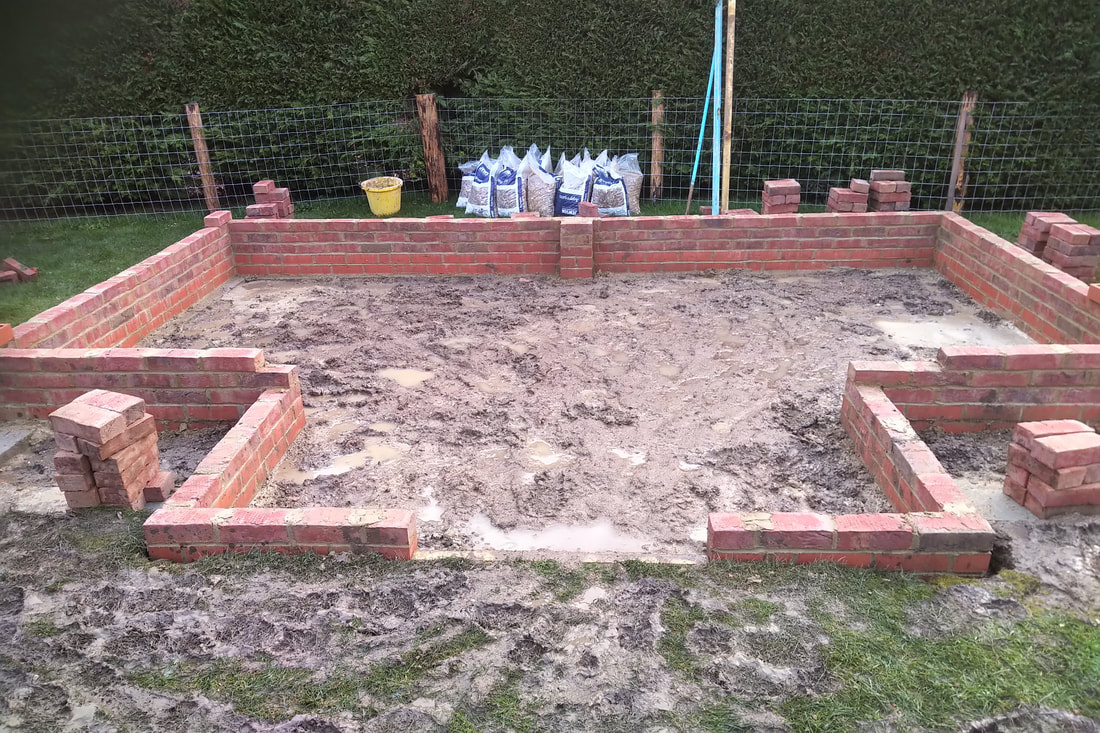
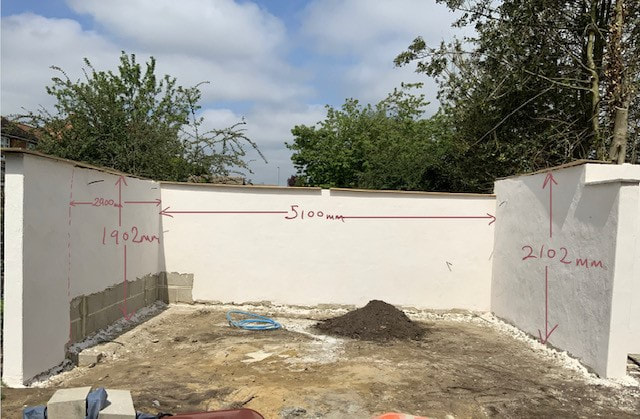 This week I'm in Selby building the base for a greenhouse which needs to fit over and between walls already erected by the customer. I've designed a greenhouse to suit these walls, drawing up some plans to make sure it meets the look and has the facilities my customer is looking for. 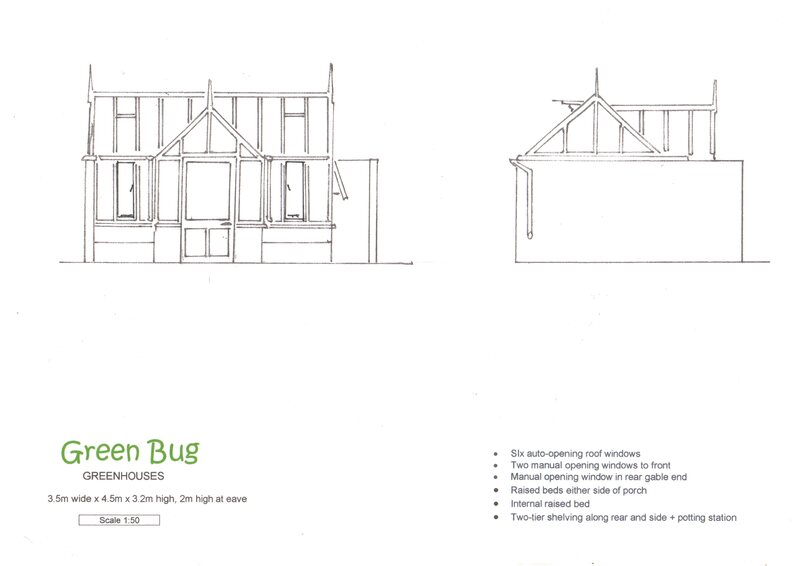 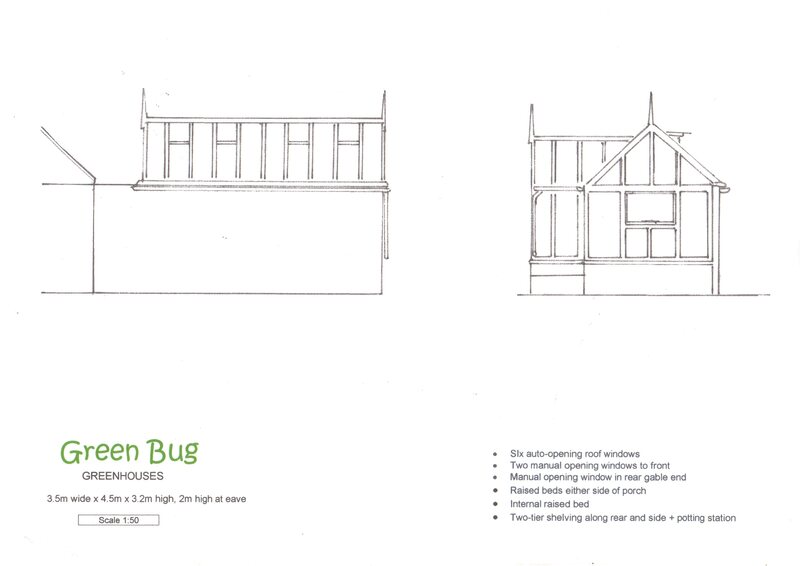 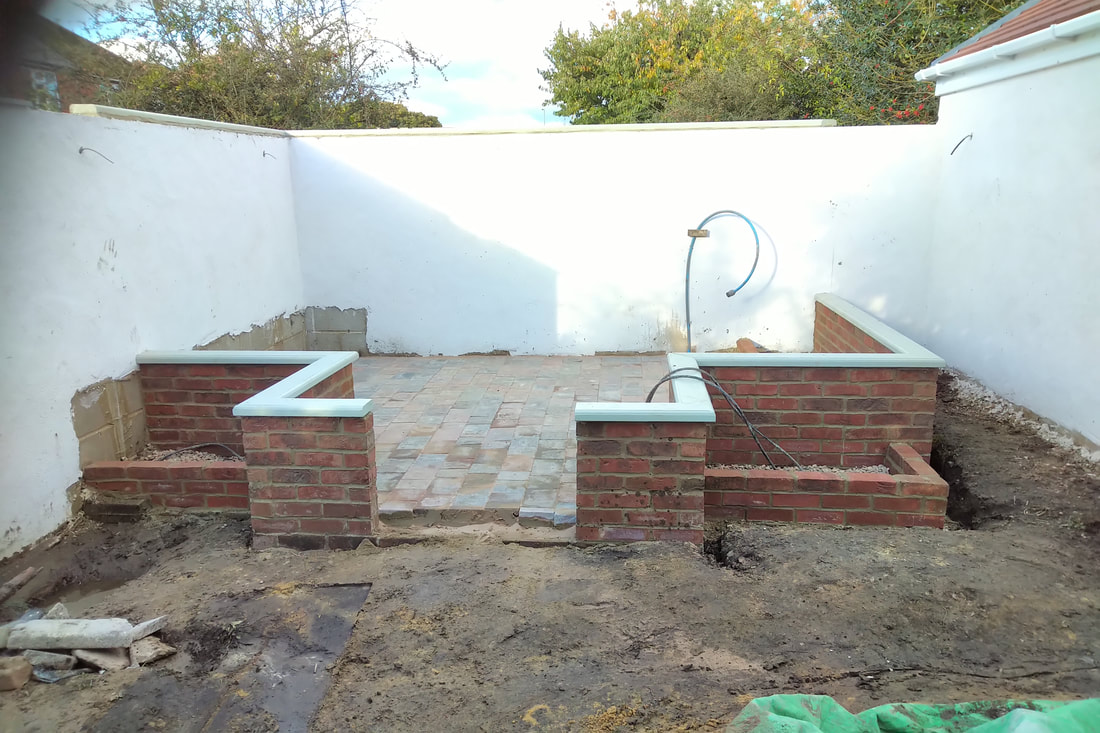 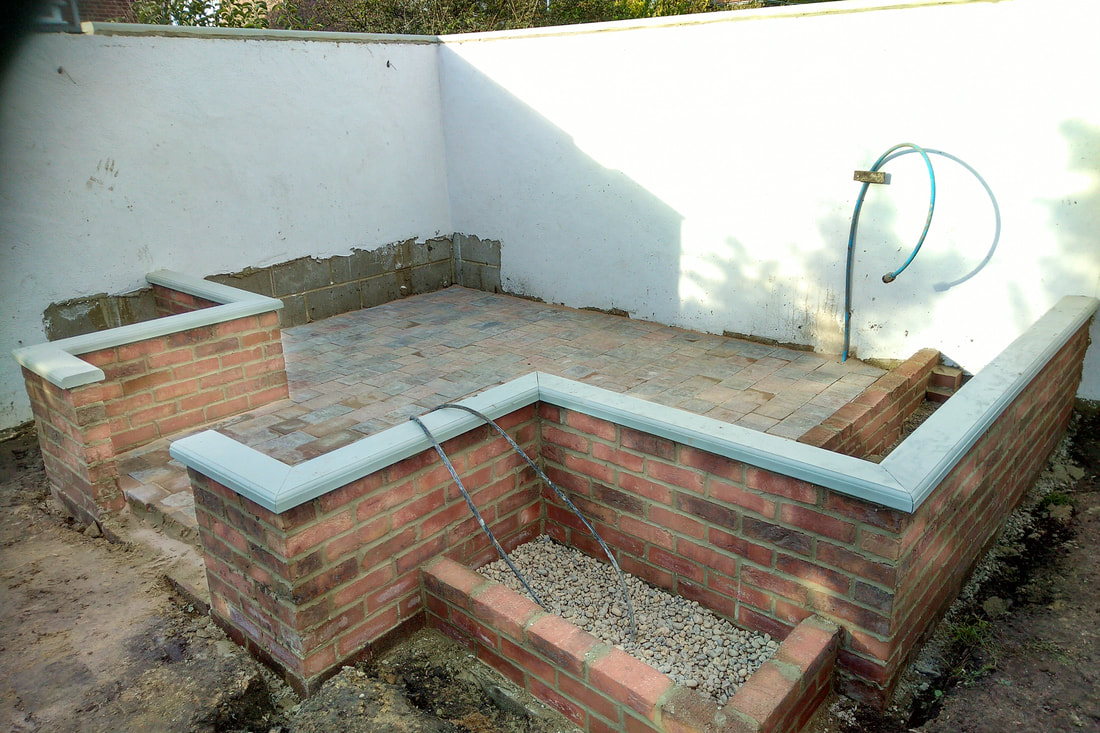 Now the greenhouse base is built I can take final measurements before finishing the construction back at the workshop and ordering up all the glass.
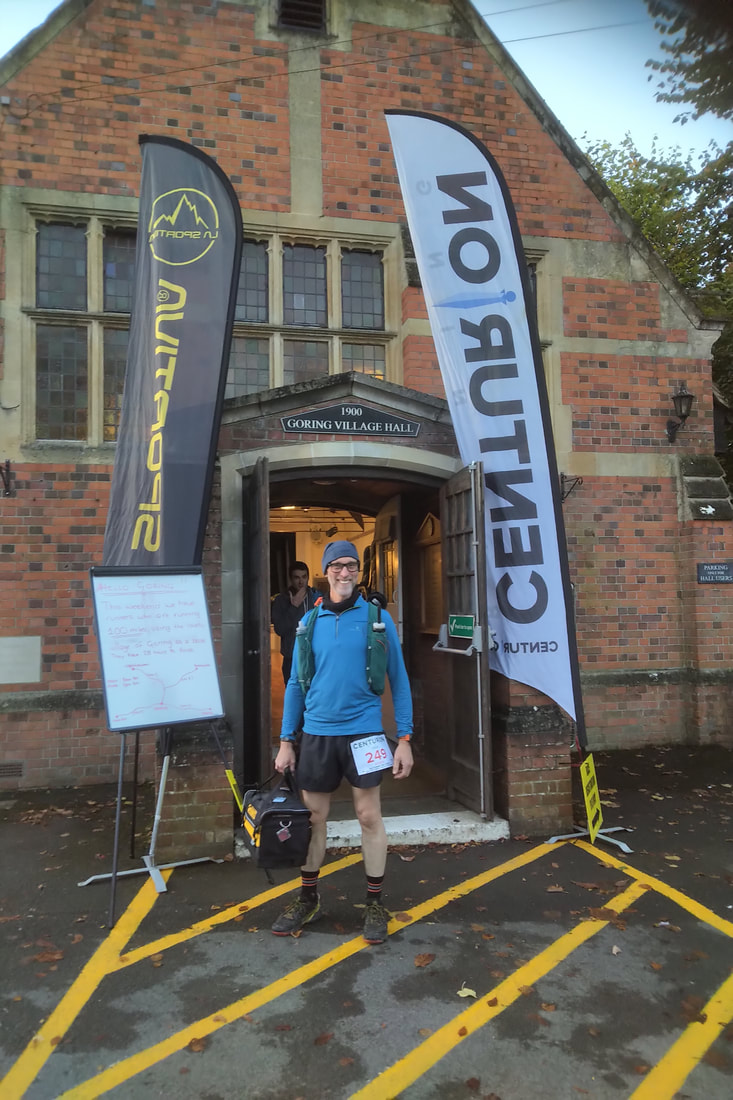
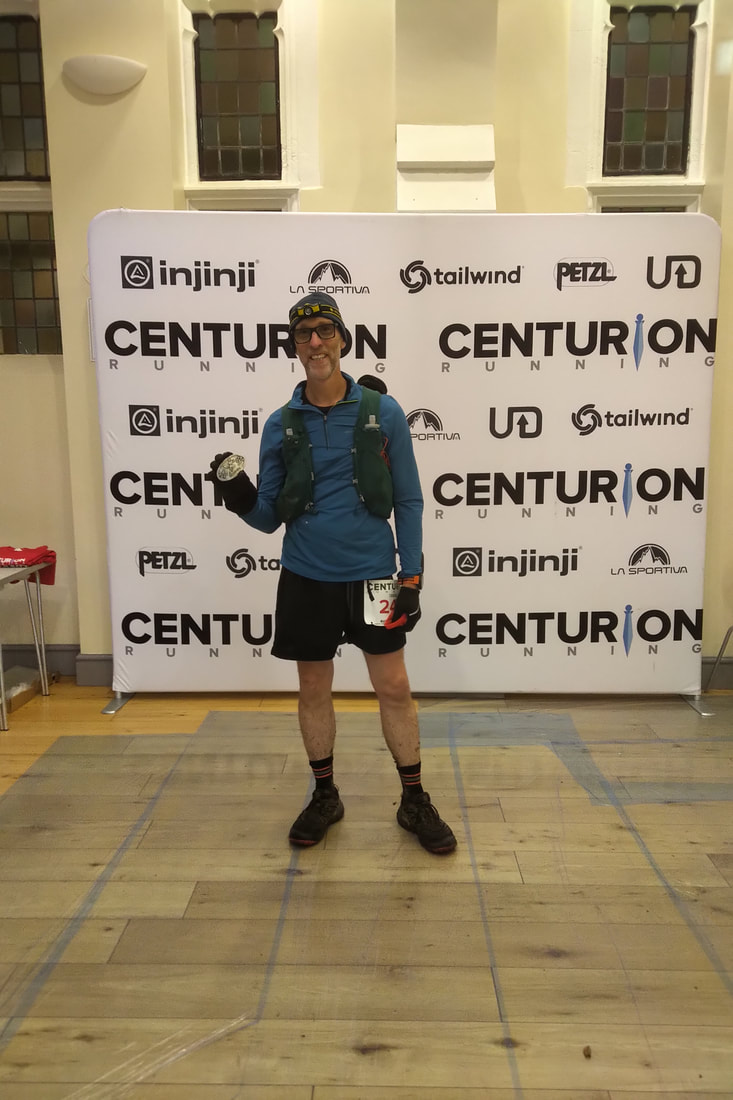
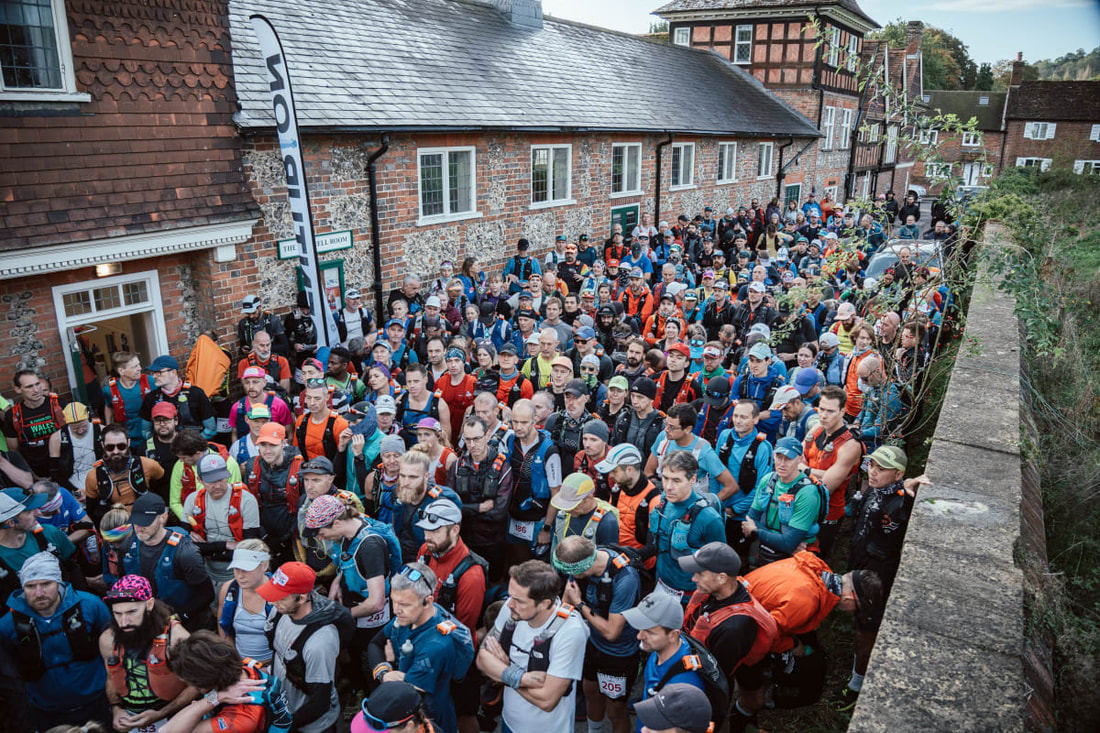 After finishing my job in Hereford I drove to Streatley to take part in a 100 mile trail run. I'm in the picture above just behind the tree on the RH side, with shades on looking at my phone. The aim was for me to try and complete in under 24 hours - they give you 26 hours to do it but you get a special medal if under 24 hrs. 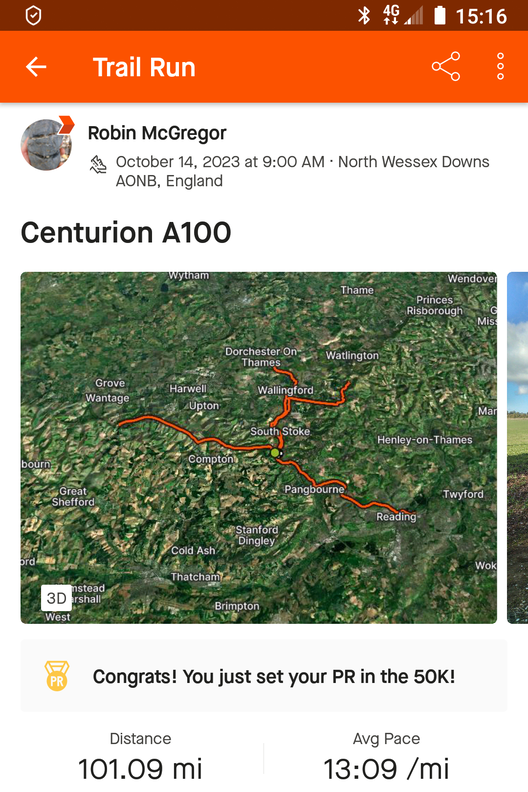 Before and after photos. I came in at 22hrs 41 mins. Thanks to all my friends and family who supported me with messages during the race. We also raised lots for Prostate Cancer UK.
|
Click on each
|

 RSS Feed